

Any rough estimates for converting a 11-87 into a dedicated turkey gun? My gun has a cracked forend so I would buy a synthetic replacement set. The other work would be shortening the barrel and tapping a new choke, a bead blast and full dip, and tapping the receiver for a mount. The barrel is bulged below the choke making the shortening a necessity. I'm just trying to decide whether to let this one go and buy new, or go ahead with the repairs/ upgrades. Thanks for your input!
Sent from my SM-G950U1 using Tapatalk
Turkey gun conversion cost
Turkey gun conversion cost
Last edited by Grayling on May 4th, 2020, 9:51 am, edited 1 time in total.
-
Hoobilly

- Gobbler Nation

- Posts: 13411
- Joined: August 15th, 2011, 10:15 pm
- Location: Argos Indiana
- Contact:
Re: Turkey gun conversion cost
My honest opinion is let it go and start with a newer gun. Only reason to build one from your gun is that it was handed down to you from your dad grandpa etc.
The 12 & 20ga’s out there right now can be serious turkey killers pretty cheaply
The 12 & 20ga’s out there right now can be serious turkey killers pretty cheaply
-
Southern Sportsman

- Gobbler Nation

- Posts: 1314
- Joined: February 24th, 2013, 12:32 am
- Location: West TN
Re: Turkey gun conversion cost
New stock/foreend ~ $75Grayling wrote: ↑May 4th, 2020, 9:51 am Any rough estimates for converting a 11-87 into a dedicated turkey gun? My gun has a cracked forend so I would buy a synthetic replacement set. The other work would be shortening the barrel and tapping a new choke, a bead blast and full dip, and tapping the receiver for a mount. The barrel is bulged below the choke making the shortening a necessity. I'm just trying to decide whether to let this one go and buy new, or go ahead with the repairs/ upgrades. Thanks for your input!
Sent from my SM-G950U1 using Tapatalk
Cut/re-thread barrel ~ $100-$150
Dip or cerakote ~ $200
Drill/Tap receiver ~ $50
IMO - you’re not going to sell or trade it for much with a bulged barrel and cracked forend, so it would probably be worth having it cut and re-threaded and replacing. The stock/forend even if you don’t keep it. So those costs could be considered a wash.
If you like the gun, you would probably come out a little better just keeping it and converting it to a turkey gun.
I go stubbornly into error by myself, and reach my own fallacious conclusions using my own faulty data. ~Tom Kelly
Re: Turkey gun conversion cost
Thanks for your suggestions, so around $500 all said and done. I have been considering buying an M2 which would be an all purpose gun. Are there viable light 12 gauge tss loads that would pattern well/ perform similarly to a 20 gauge? My thinking is to have a gun for grouse and waterfowl for me, and a lighter recoiling turkey gun for my wife and kids to use. My wife owns a .410 Stevens turkey gun which works fine, the 12 gauge would be for times when she is hunting in areas of limited opprtunity.
Sent from my SM-G950U1 using Tapatalk
Sent from my SM-G950U1 using Tapatalk
-
BrowningGuy88
- Posts: 767
- Joined: February 13th, 2013, 9:01 am
Re: Turkey gun conversion cost
Yes there are light TSS loads. I use 1-3/4 ounce and it’s deadly.
FoxTrot Ammo sells a 1-5/8 ounce Mini Twister that certainly patterns well.
FoxTrot Ammo sells a 1-5/8 ounce Mini Twister that certainly patterns well.


Re: Turkey gun conversion cost
Save yourself $180 off Ceracoating by rattle-can spraying the gun with Rustoleum camo paint. A good, repairable coating. Gil
Re: Turkey gun conversion cost
That's a good suggestion, that would put it around $300 and could always dip it later if I chose to.GLS wrote:Save yourself $180 off Ceracoating by rattle-can spraying the gun with Rustoleum camo paint. A good, repairable coating. Gil
Sent from my SM-G950U1 using Tapatalk
Re: Turkey gun conversion cost
The light twister loads sound good. I was considering a 20 gauge but if a 12 will perform the same, buying a new 20 autoloader makes no sense for me. The price of those pills will probably have me rolling my own though. I'd flinch too much at $11 per shot.[emoji38]
Sent from my SM-G950U1 using Tapatalk
Sent from my SM-G950U1 using Tapatalk
Re: Turkey gun conversion cost
Any chance you could give me a line on who is dipping guns for 200? The cheapest I have been able to find is 300. With most being in the 350 range. Any information would be much appreciated.Southern Sportsman wrote: ↑May 4th, 2020, 10:41 amNew stock/foreend ~ $75Grayling wrote: ↑May 4th, 2020, 9:51 am Any rough estimates for converting a 11-87 into a dedicated turkey gun? My gun has a cracked forend so I would buy a synthetic replacement set. The other work would be shortening the barrel and tapping a new choke, a bead blast and full dip, and tapping the receiver for a mount. The barrel is bulged below the choke making the shortening a necessity. I'm just trying to decide whether to let this one go and buy new, or go ahead with the repairs/ upgrades. Thanks for your input!
Sent from my SM-G950U1 using Tapatalk
Cut/re-thread barrel ~ $100-$150
Dip or cerakote ~ $200
Drill/Tap receiver ~ $50
IMO - you’re not going to sell or trade it for much with a bulged barrel and cracked forend, so it would probably be worth having it cut and re-threaded and replacing. The stock/forend even if you don’t keep it. So those costs could be considered a wash.
If you like the gun, you would probably come out a little better just keeping it and converting it to a turkey gun.
Thanks man
-
Southern Sportsman
- Gobbler Nation
- Posts: 1314
- Joined: February 24th, 2013, 12:32 am
- Location: West TN
Re: Turkey gun conversion cost
jsh909 wrote: ↑May 4th, 2020, 6:13 pmAny chance you could give me a line on who is dipping guns for 200? The cheapest I have been able to find is 300. With most being in the 350 range. Any information would be much appreciated.Southern Sportsman wrote: ↑May 4th, 2020, 10:41 amNew stock/foreend ~ $75Grayling wrote: ↑May 4th, 2020, 9:51 am Any rough estimates for converting a 11-87 into a dedicated turkey gun? My gun has a cracked forend so I would buy a synthetic replacement set. The other work would be shortening the barrel and tapping a new choke, a bead blast and full dip, and tapping the receiver for a mount. The barrel is bulged below the choke making the shortening a necessity. I'm just trying to decide whether to let this one go and buy new, or go ahead with the repairs/ upgrades. Thanks for your input!
Sent from my SM-G950U1 using Tapatalk
Cut/re-thread barrel ~ $100-$150
Dip or cerakote ~ $200
Drill/Tap receiver ~ $50
IMO - you’re not going to sell or trade it for much with a bulged barrel and cracked forend, so it would probably be worth having it cut and re-threaded and replacing. The stock/forend even if you don’t keep it. So those costs could be considered a wash.
If you like the gun, you would probably come out a little better just keeping it and converting it to a turkey gun.
Thanks man
Jason Campbell - J.C. Customs
Martin, TN
He does it part time and doesn’t have much of a website, but he’s got a sweet shop and does good work. He does cerakote too. You can find him on Facebook if you’ve got it. If you don’t, shoot me a PM and I’ll find his number.
Last edited by Southern Sportsman on May 4th, 2020, 9:49 pm, edited 1 time in total.
I go stubbornly into error by myself, and reach my own fallacious conclusions using my own faulty data. ~Tom Kelly
Re: Turkey gun conversion cost
PM sent, thanks. No face bookSouthern Sportsman wrote: ↑May 4th, 2020, 9:41 pmjsh909 wrote: ↑May 4th, 2020, 6:13 pmAny chance you could give me a line on who is dipping guns for 200? The cheapest I have been able to find is 300. With most being in the 350 range. Any information would be much appreciated.Southern Sportsman wrote: ↑May 4th, 2020, 10:41 am
New stock/foreend ~ $75
Cut/re-thread barrel ~ $100-$150
Dip or cerakote ~ $200
Drill/Tap receiver ~ $50
IMO - you’re not going to sell or trade it for much with a bulged barrel and cracked forend, so it would probably be worth having it cut and re-threaded and replacing. The stock/forend even if you don’t keep it. So those costs could be considered a wash.
If you like the gun, you would probably come out a little better just keeping it and converting it to a turkey gun.
Thanks man
Jason Campbell - J.C. Customs
Martin, TN
He does it part time and doesn’t have much of a website, but he’s got a sweet shop and does good work. He does cerakote too. You can find him on Facebook if you’ve got it. If you don’t, shoot me a PM and I’ll find his number.
Re: Turkey gun conversion cost
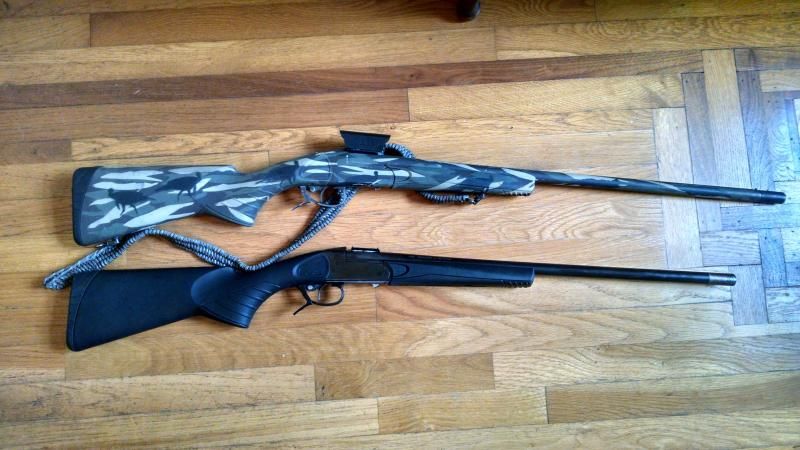
If you do decide to rattle-can paint it, here's what I did to a gun I once owned. A buddy now has it. It has 8 seasons in the woods and while it shows wear, it has held up remarkably well. He hasn't gotten around to repairing the wear, but it would be easy to do. From another site 8 years ago this coming August:
I thought about having the new gun dipped, but the rattle-can job has really held up well. And it is easily repairable. I found an online discussion from an auto paint-body shop man who gives great advice on rattle-can painting. The big points are attention to preparation and allowing the paint to cure for at least a month (if you can) before use. Here’s what he had to say:
"Thanks for answering my question and I'll explain why I asked you. I'm a bodyman/painter by trade, I've been doing it for about 20 years. I've mainly made my living doing custom work like airbrushing, handlettering, pinstriping and graffics. Bikes, brain buckets, boats, etc. I experimented A LOT with different types of paints over the years for different types of appilcations. I'm telling this about myself so you don't think I'm some Joe-Blow giving bad advise about paint, which I see plenty of on this forum. So when ever I see someone having a paint related problem, I usually like to chime in and give my two bits.
I've never used Rustoluim BBQ paint myself, but what happened to your paint job I don't really think can be blamed on the paint itself. I'm assuming that the BBQ paint is probably an enamel based product and when it was fully dried it would have stood up to giving it a quick wipe down with oil. I think you just did it too soon, the oil started breaking down the paint and interrupted the drying/curing process. That's probably why it continued to leave black on your hands for days after.
I'll give you guys a little painting 101. There basically two types of paint out there, one-part and two-part paints. One part-paint is a paint that dries through evaporation; the one-part means there is nothing to add to it, the one-part is the paint itself. Two-part paints cure through a chemical reaction, they have to have an activator(also known as hardener or catalyst) to make them cure. The first-part is the paint and the second-part is the activator. One-part and two-parts apply to all paints weather it is latex, laquer, enamels, urethanes or epoxys. Two-part paints with be more durable in the long run and will be highly solvent resistant compared to one-part paints. Notice I said one dries and one cures...
But not everyone wants or is going to spray two part-paints, esp when spray bombs are quick, easy and cheap. But I'll give you guys a few pointers to make spray bomb paint fairly durable.
I noticed a few people were saying that Rusty brand BBQ scratches easily and flakes off. I'm guessing people are spraying it over bare metal, even if the directions say you can, it's probably not a good idea. As far a I know, there is no true DTM(direct to metal) paint on the market in a spray can. You have to get into two-part paints for a true DTM paint, even then it's not always 100% it's not going to flake off. Check out local auto-body supply stores and look for metal-etching primer in the spray can, it's usually farily cheap and it goes a long way.
Here are some simple steps to make sure your paint job will turn out great.
1-Degrease. Do this as many times as nessecary, also never let the degreaser dry. Wipe the excess off or blow off with compressed air.
2- Scuff/sand areas really well.
3-Blow off with compressed air; if you don't have an air compressor, compressed air in a can works very well(the stuff from computer stores).
4-Tack surface
5-Etch prime all bare metal.
6-Spray paint according to diections.
7-Let it become dry to the touch.
The last step is the hardest step of all, but simply put...KEEP YOUR HANDS OFF IT FOR 2-3 WEEKS, even better a month. I know this part is espially hard when you just got done building your new gun. Even two-part paints take 3-4 weeks to FULLY cure. I like to paint snowmobile hoods during the summer and bike tanks during the winter, it gives the paint time to fully cure and give the customer their moneys worth. But it is the hardest thing to get through to my customers; when it gets all nice and warm, that's when everyone wants their bikes painted."

Re: Turkey gun conversion cost
+1
I may not be smart but I can lift heavy objects
I have no need for a 30-06, I have a shotgun
I have no need for a 30-06, I have a shotgun